

My family are originally Irish, and I was an Irish dancer for 19 years, so I like to mark today in my memory books with a shamrock or ten!
This technique can be used for almost any design.
What you need:
- Silhouette CAMEO 3, or any Cameo/Portrait machine
- Sketch pen of your choice
- Automatic blade
- 12x12 Silhouette mat
- Paper
- Design #183748 (or any design from the Silhouette Studio!)
What to do
Step 1
Purchase your design from the design store, and wait for it to appear in your library. Open a new Silhouette document, and set your page settings appropriately (I'm using an A4 sheet on a 12x12 mat)
Load your new design into your page.


Step 2
Select your design, then click on the Offset tool.This part is important to make the process as simple as possible. Here's what I do.
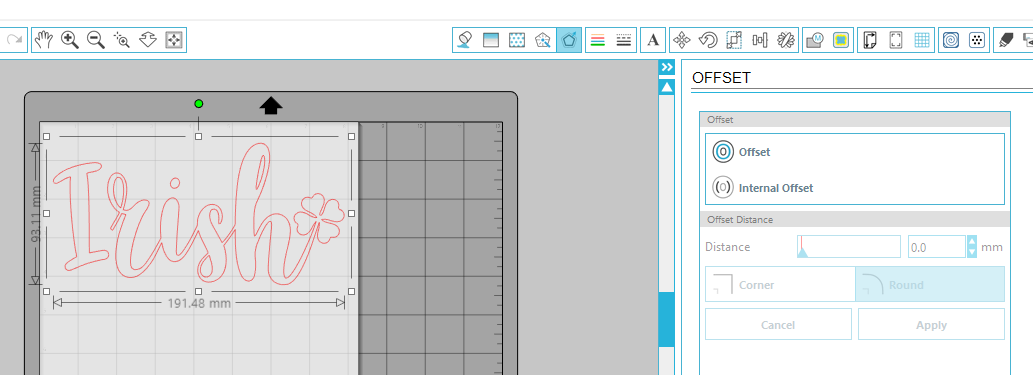
First of all I click "Internal Offset", then set it to 0.5mm, round. I click "Apply", and then without clicking anywhere else, I group the newly created offset by using the "Ctrl+G" keyboard shortcut. Just hold down the Control button (or the Apple button on Mac), and press the letter G. This will group all of the newly created lines, and keep them selected.
You can now just click "Internal Offset" again, and repeat the exact same process. You will notice that your design starts to fill up with lines, which the sketch pen will draw. They are so close together that they look solid!
This is my design after four internal offsets:
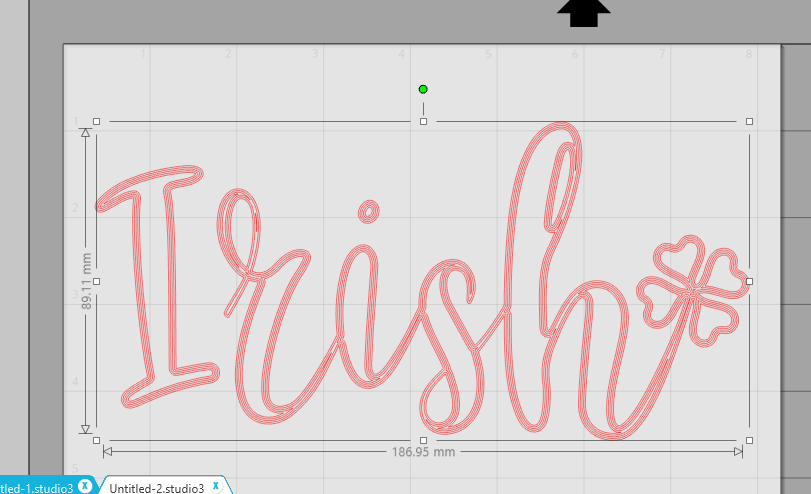
And then again, all filled in:

Step 3
I selected all of the lines by dragging a box over the entire design. In the Cut Settings menu, I selected "Tool 2", and told the software that my Tool 2 material was a Silhouette Sketch Pen. I'm using the green glitter sketch pen in the tool 2 holder of my Cameo 3.

Step 4
I resized the image down to approximately 3 inches wide. I want to cut out my sentiment when it is drawn, so I carefully selected the outermost sketch pen line and applied an offset of 3.5mm.
I made sure that this line was "Tool 1" in the Cut Settings window, and set Tool 1 to Cardstock (Blade 3, Speed 5, Thickness 30 for me) with the Automatic Blade.

Step 5
Send to Silhouette!


I am so in love with this technique because I'm quite new to Sketch Pens, so I hope this has helped you. I think I might try using my PixScan mat to put filled in sentiments directly onto my planner pages next...
PRODUCTS USED:
 |  |  |
Such a great idea! Filling in fonts with sketch pens is my arch enemy, but this has made it look so simple! Thanks!
ReplyDeleteGreat idea. Did it take long for the Silhouette to sketch it out?
ReplyDelete